腾讯云服务器使用ssl + 域名安全访问
重新修改服务器设置
使用前先将wordpress 端口从80挪开
-
原因:宿主机需要安装nginx 用来申请ssl。而之前wordpress 服务把80端口占用了。需要将它移走。
-
遇到的问题:(已解决)
-
docker 配置端口映射问题( 宿主机5000-> 容器80 )
// 先暂停容器 docker stop w-wordpress // 进入容器所在的文件夹并修改端口映射 cd /var/lib/docker/containers/36e3e45f529e60050287a3526b5152668b68efb5f28c51a80147de7fc901b33a // 修改hostconfig.json 与 config.v2.json 文件 vim config.v2.json // 使用/查找ExposedPort并修改里面的端口 "ExposedPorts":{"80/tcp":{}}, // 左边的就是容器内要暴露的端口。 -
端口访问wordpress 界面会被重新指向80端口。
-
配置nginx 指向服务。并设置ssl
- 强制映射80 端口到443,保障https 的安全性
配置wordpress 的apache2 的ssl ,配置nextcloud 的ssl
端口迁移(这一步应当在做完SSL 之后站点地址确认之后在执行)
docker 端口重新映射之后导致图片访问不了。根据chatGPT 的方案,进行数据库的修改最终解决图片重命名的问题。( 注意:用该方法之前请务必备份 )
-
安装插件
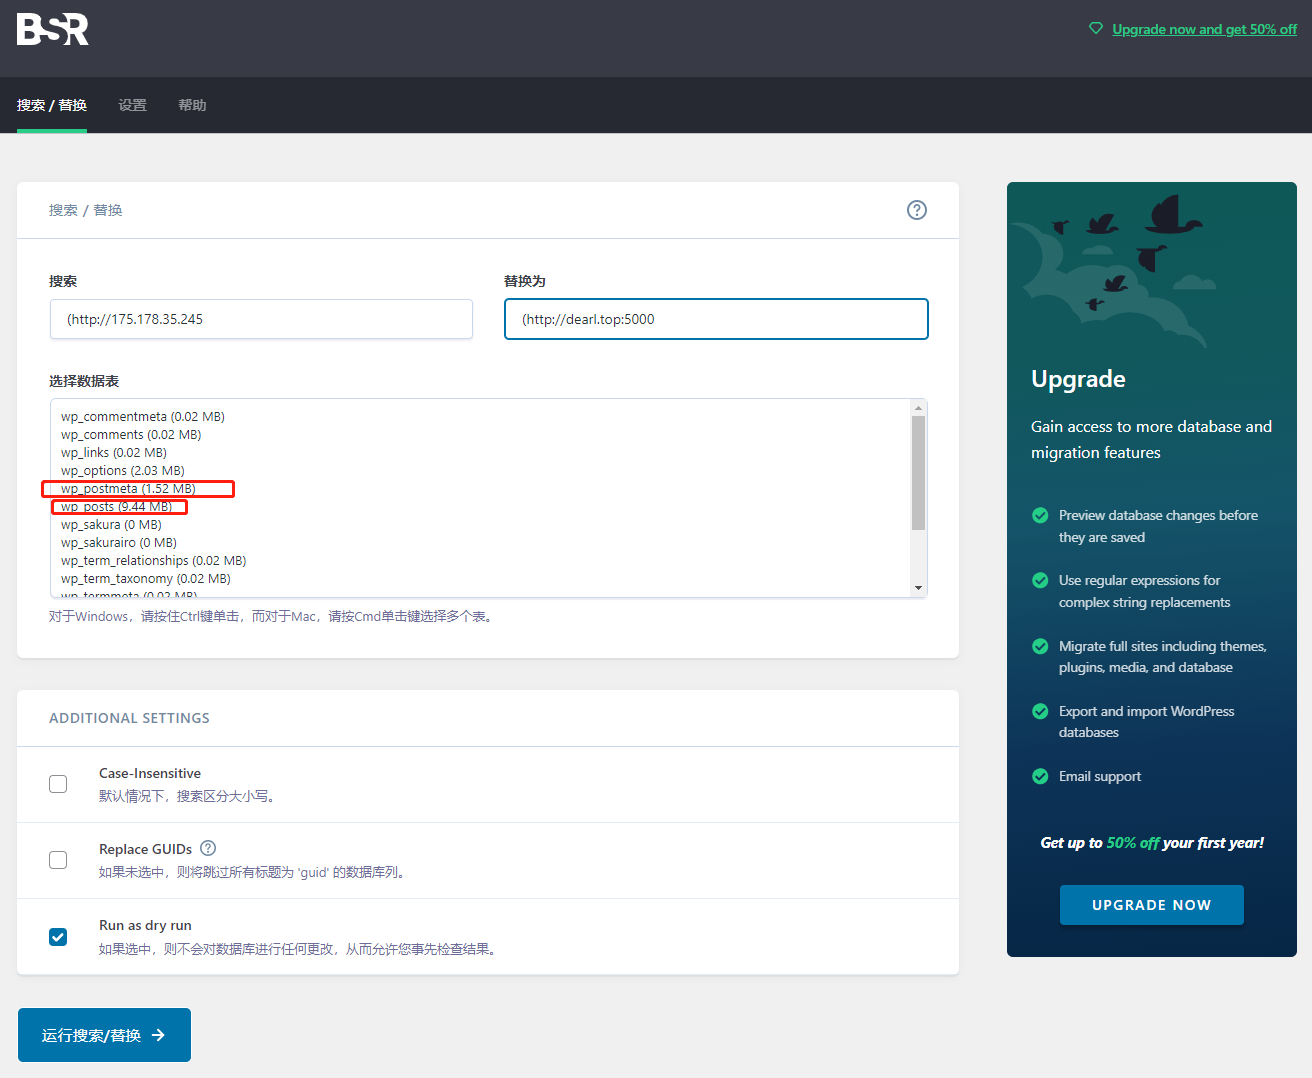
Better Search Replace
-
修改数据表的内容(wp_posts 表中存放的是博客的文字性内容,以及别的。wp_postmeta 表中存放的可能是索引之类的)chatGPT 建议修改这2个表的内容。( 下方那个选项框是查找,如果取消勾选就是替换 )
破案了:全部的表都给它换掉 -
此时图片就能正常显示了,但是还有一部分是博客依旧是ip地址显示,因此我们要去管理台设置新站点地址。


使用certbot 申请ssl 证书(已完成)
root@VM-8-11-ubuntu:/etc/nginx/sites-available# sudo certbot --nginx -d dearl.top -d www.dearl.top
Saving debug log to /var/log/letsencrypt/letsencrypt.log
Plugins selected: Authenticator nginx, Installer nginx
Obtaining a new certificate
Performing the following challenges:
http-01 challenge for dearl.top
http-01 challenge for www.dearl.top
Waiting for verification...
Cleaning up challenges
Deploying Certificate to VirtualHost /etc/nginx/sites-enabled/default
Deploying Certificate to VirtualHost /etc/nginx/sites-enabled/default

Please choose whether or not to redirect HTTP traffic to HTTPS, removing HTTP access.
- - - - - - - - - - - - - - - - - - - - - - - - - - - - - - - - - - - - - - - -
1: No redirect - Make no further changes to the webserver configuration.
2: Redirect - Make all requests redirect to secure HTTPS access. Choose this for
new sites, or if you're confident your site works on HTTPS. You can undo this
change by editing your web server's configuration.
- - - - - - - - - - - - - - - - - - - - - - - - - - - - - - - - - - - - - - - -
Select the appropriate number [1-2] then [enter] (press 'c' to cancel): 2
Redirecting all traffic on port 80 to ssl in /etc/nginx/sites-enabled/default
Redirecting all traffic on port 80 to ssl in /etc/nginx/sites-enabled/default

- - - - - - - - - - - - - - - - - - - - - - - - - - - - - - - - - - - - - - - -
Congratulations! You have successfully enabled https://dearl.top and
https://www.dearl.top

You should test your configuration at:
https://www.ssllabs.com/ssltest/analyze.html?d=dearl.top
https://www.ssllabs.com/ssltest/analyze.html?d=www.dearl.top
- - - - - - - - - - - - - - - - - - - - - - - - - - - - - - - - - - - - - - - -

IMPORTANT NOTES:
 - Congratulations! Your certificate and chain have been saved at:
   /etc/letsencrypt/live/dearl.top/fullchain.pem
   Your key file has been saved at:
   /etc/letsencrypt/live/dearl.top/privkey.pem
   Your cert will expire on 2023-09-12. To obtain a new or tweaked
   version of this certificate in the future, simply run certbot again
   with the "certonly" option. To non-interactively renew *all* of
   your certificates, run "certbot renew"
 - If you like Certbot, please consider supporting our work by:

   Donating to ISRG / Let's Encrypt:   https://letsencrypt.org/donate
   Donating to EFF:                    https://eff.org/donate-le

root@VM-8-11-ubuntu:/etc/nginx/sites-available#

docker container update --mount-add type=bind,source=/etc/letsencrypt/live/dearl.top,target=/var/www/html/ssl w-wordpress
Docker 下的 两种 w-wordpress w-nextcloud容器开启ssl(已完成)
-
可行方法1:Nginx 接收443 的https 并使用upstream 拆SSL 并与wordpress 的http 进行交互
此方法已经验证可行,正是本博客使用方法
外层Nginx 作为443端口的接收,将接收到的请求通过http 转发给docker 的wordpress 容器的apache2 的80端口。也就是:外部使用https 加密,内部使用http
- nginx 部分 重点!! SSL 卸载
# 修改nginx 设置 cd /etc/nginx/sites-available vim default # 注释掉冲突部分,将80 端口的部分注释掉 # 添加upstream 的SSL卸载 upstream dearliao { server 127.0.0.1:5000; # 跳转到本地http 5000 端口 也就是docker 的wordpress 端口 # Add more servers as needed... } # 在443 部分后面添加跳转 (因为之前使用certbot letsencrypt 设置的证书,所以443 由它管理) location / { proxy_pass http://dearliao; # 这里的dearliao 只是upstream dearliao{} 的名字而已 proxy_set_header Host $host; proxy_set_header X-Real-IP $remote_addr; proxy_set_header X-Forwarded-For $proxy_add_x_forwarded_for; proxy_set_header X-Forwarded-Proto $scheme; } # 给之前注释的80 端口重获新生(重新写一个) server { listen 80; server_name dearl.top; return 301 https://$host$request_uri; } # 测试 并 重新加载nginx nginx -t nginx -s reload systemctl restart nginx- 页面设置部分 重点:1.去wp-config.php 开启HTTPS,2.修改站点地址!!
# 1. 登录http://dearl.top:5000/admin 修改 '站点地址' 为 https://dearl.top 以及 'WordPress地址' 为 https://dearl.top # 2. 此时访问 https://dearl.top 已经可以不正常地访问了。 因为CSS js脚本的缘故,导致https 无法正常访问按照步骤3开启HTTPS 就可以正常访问了 # 3. 在服务器中进入docker 内部 docker exec -it w-wordpress bash 修改根目录下的 wp-config.php # 如果没装vim 的还是装一个吧。不过什么都行只要能更改,大不了复制出来再改 vim wp-config.php # 我一般在数据库那边添加如下信息 强制使用https $_SERVER['HTTPS']='on'; # 这一行一定要加!!! # 其实下面这2行不加也行,但是前面的站点地址和WordPress地址必须改为https, define( 'WP_SITEURL', 'https://' . $_SERVER['HTTP_HOST'] . '/' ); define( 'WP_HOME', 'https://' . $_SERVER['HTTP_HOST'] . '/' ); #### 此时已经可以正常https 访问博客了 ###### -
可行方法2:Nginx将443端口转发出来,转发到4999端口,并在docker 容器内使用ssl ( 测试通过,但我不选该方法,因为麻烦)
评价:稍微麻烦点,还得设置nextcloud 容器。
- 容器增加新的端口映射
# 停止要修改的wordpress 容器 docker stop w-wordpress # 进入目录 /var/lib/docker/containers/36e3e45fxxxxx 最后一个目录是容器名字全称 cd /var/lib/docker/containers/36e3e45f529e60050287a3526b5152668b68efb5f28c51a80147de7fc901b33a # 修改hostconfig.json 开放端口4999 给https,5000 给的http 后面在服务器防火墙层面关掉5000端口 vim hostconfig.json "PortBindings": { "80/tcp": [ { "HostIp": "", "HostPort": "5000" } ], "443/tcp": [ { "HostIp": "", "HostPort": "4999" } ] }, # 修改config.v2.json 开放容器内的443端口 vim config.v2.json "ExposedPorts": { "80/tcp": {}, "443/tcp":{} },- 容器增加挂载点( 在上面端口开放之后修改文件 )
# config.v2.json 修改挂载点,Source 是宿主机路径,Destination 是容器内路径,也可以是文件 "MountPoints": { "/usr/local/etc/php/conf.d/uploads.ini": { "Source": "/root/uploads.ini", "Destination": "/usr/local/etc/php/conf.d/uploads.ini", "RW": true, "Name": "", "Driver": "", "Type": "bind", "Propagation": "rprivate", "Spec": { "Type": "bind", "Source": "/root/uploads.ini", "Target": "/usr/local/etc/php/conf.d/uploads.ini" }, "SkipMountpointCreation": false }, "/letsencrypt": { "Source": "/etc/letsencrypt", "Destination": "/letsencrypt", "RW": true, "Name": "", "Driver": "", "Type": "bind", "Propagation": "rprivate", "Spec": { "Type": "bind", "Source": "/etc/letsencrypt", "Target": "/letsencrypt" }, "SkipMountpointCreation": false }, "/var/www/html": { "Source": "", "Destination": "/var/www/html", "RW": true, "Name": "af36c5c649ec585e716a5b767b32e64f29d97d9430e23d6eb2a5d0cdeb8aa157", "Driver": "local", "Type": "volume", "Spec": {}, "SkipMountpointCreation": false } }, ############################ 分割线 ########################## # hostconfig.json 修改Binds 所映射的文件夹路径, 注意有一个uploads.ini 是以前映射的文件。 ## 格式 ' 宿主机路径:容器内路径 ' "Binds": [ "/root/uploads.ini:/usr/local/etc/php/conf.d/uploads.ini", "/etc/letsencrypt:/letsencrypt" ],- 给wordpress 添加HTTPS
( 注意! 我这里直接使用密钥的真实路径 )
( 理论上可以使用相对路径 ' /letsencrypt/live/dearl.top ' 我没测试过,不过应该可行 )
因为每次自动刷新密钥可能 真实路径的密钥文件名会发生改变
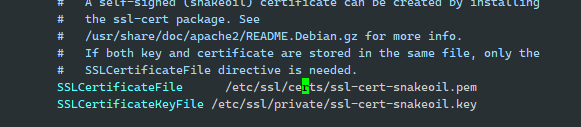
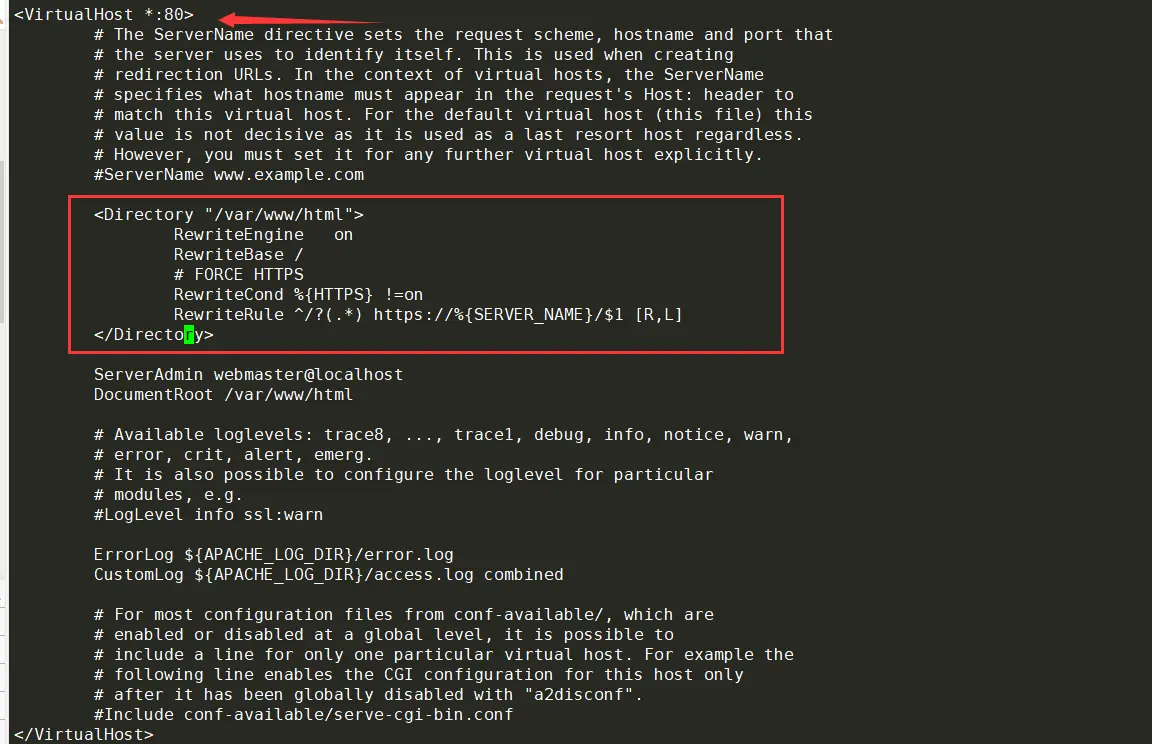
# 进入容器 docker exec -it w-wordpress bash 由于之前的容器内挂载点设置为 '/letsencrypt' # 创建文件夹 mkdir /letsencrypt # 开启SSL a2enmod ssl # 设置apache 的SSL 路径 vim /etc/apache2/sites-available/default-ssl.conf ## 修改内容 上面公钥 下面私钥,具体看路径 SSLCertificateFile /letsencrypt/archive/dearl.top/fullchain1.pem SSLCertificateKeyFile /letsencrypt/archive/dearl.top/privkey1.pem # 使SSL 被加载 ln -s /etc/apache2/sites-available/default-ssl.conf /etc/apache2/sites-enabled/default-ssl.conf # 编辑apache2 的文件使其强制转到https ( 这一部分我没设置,不过应该能行。 ) vim /etc/apache2/sites-available/000-default.conf ## 找到VirtualHost *:80 这里,并在其下方添加如下配置 (下图)RewriteEngine on RewriteBase / # FORCE HTTPS RewriteCond %{HTTPS} !=on RewriteRule ^/?(.*) https://%{SERVER_NAME}/$1 [R,L] # 重启wordpress docker restart w-wordpress- Nginx 跳转部分 (这一部分我还没具体做,不过都已经做到此处了,想必这里已经不是难事了)
# 大致按着下面改吧, 参考gitlab 当时做的
cd /etc/nginx/sites-available
vim wordpress.evolute.in
## 增加以下内容  看着改
server {
    listen       443;  #原作者的 gitlab 一般使用 8022 端口访问
    server_name  localhost;

    location / {
        root  html;
        index index.html index.htm;
        proxy_pass http://127.0.0.1:8021; #这里与前面设置过的端口一致
    }
}

## 参考命令
sudo ln -s /etc/nginx/sites-available/wordpress.evolute.in /etc/nginx/sites-enabled/wordpress.evolute.in

########### 这一部分后面如果遇到了再想办法解决 #############
或者是在 default  的443 部分的location 进行设置跳转。
最终要实现的结果:以https://dearl.top 的形式跳转之后 浏览器url 还是https://dearl.top 其中dearl.top 后面不能加端口
创建定时任务,每个月1号凌晨3点执行一次所有域名自动续期的操作
# 创建定时任务
sudo crontab -e

## 然后选2,习惯使用vim 编辑器

# 在最后添加一行
##该 cron 表达式的含义是:每个月的 1 日凌晨 3 点执行 /home/certbot-auto renew --renew-hook "sudo nginx -s reload" 这个命令。
0 3 1 * * /home/certbot-auto renew --renew-hook "sudo nginx -s reload"

# 检查命令是否添加成功
sudo crontab -l
-
到每个月1号过后验证该命令是否执行
# 验证命令行 grep "certbot-auto renew" /var/log/syslog
root@VM-8-11-ubuntu:/etc/letsencrypt/archive/dearl.top# grep "certbot-auto renew" /var/log/syslog

##得到信息
Aug  1 03:00:01 localhost CRON[10661]: (root) CMD (/home/certbot-auto renew --renew-hook "sudo nginx -s reload")
root@VM-8-11-ubuntu:/etc/letsencrypt/archive/dearl.top#
Nextcloud 使用HTTPS
方案选择: 由于我的Nextcloud 依旧是部署在docker 下的,因此做法和 wordpress 并无什么不同。
- 浏览器和服务器Nginx 采用HTTPS 访问,Nginx 再通过SSL 卸载,与Nextcloud 通信
- Nginx 转发https 的消息,让Nextcloud 自己处理HTTPS 的加密和解密
-
目前采用 和wordpress 一样的方法,映射5001 的HTTPS 端口到 5002 的http 端口。
cd /etc/nginx/sites-available vim nextcloud.evolute.in # 添加如下信息 upstream nextcloud { server 127.0.0.1:5002; # 跳转到本地http 5000 端口 也就是docker 的wordpress 端口 # Add more servers as needed... } # Nginx 的处理 server { root /var/www/html; index index.html index.htm index.nginx-debian.html; server_name dearl.top www.dearl.top; # managed by Certbot listen [::]:5001 ssl ipv6only=on; # managed by Certbot listen 5001 ssl; # managed by Certbot ssl_certificate /etc/letsencrypt/live/dearl.top/fullchain.pem; # managed by Certbot ssl_certificate_key /etc/letsencrypt/live/dearl.top/privkey.pem; # managed by Certbot include /etc/letsencrypt/options-ssl-nginx.conf; # managed by Certbot ssl_dhparam /etc/letsencrypt/ssl-dhparams.pem; # managed by Certbot location / { proxy_pass http://nextcloud; proxy_set_header Host $host; proxy_set_header X-Real-IP $remote_addr; proxy_set_header X-Forwarded-For $proxy_add_x_forwarded_for; proxy_set_header X-Forwarded-Proto $scheme; } } ##server { ## listen 5002; ## server_name dearl.top www.dearl.top; ## return 301 https://$host:5001$request_uri; ##} # 使配置载入nginx sudo ln -s /etc/nginx/sites-available/nextcloud.evolute.in /etc/nginx/sites-enabled/nextcloud.evolute.in -
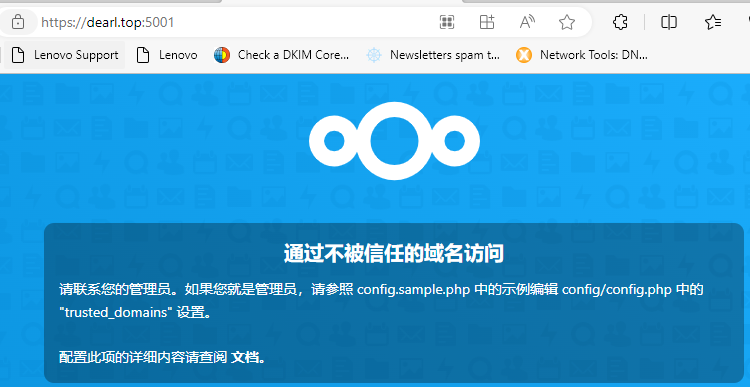
按照如上做法就能访问到nextcloud ,但是会有一个报错
# 进入docker 的nextcloud 容器内部 docker exec -it w-nextcloud bash # 进入 /var/www/html/config 目录 并修改config.php 配置文件 vim /var/www/html/config/config.php # 在trusted_domains 中的array 数组中添加(参考如下修改) 'trusted_domains' => array ( 0 => 'http://dearl.top:5001', 1 => 'https://dearl.top:5001', ), # overwrite.cli.url 修改(添加)为 'overwrite.cli.url' => 'https://dearl.top:5001', # overwriteprotocol 修改(添加)为 'overwriteprotocol' => 'https', # overwritehost 修改(添加)为 'overwritehost' => 'dearl.top:5001', ##### 此时就能正常https 访问nextcloud 了 -
如果对于nextcloud 上传报错,'未知的错误' 时,但是能下载云盘中的文件。这时候应当考虑是Nginx 阻止了大文件的下载。
# 这时候应该去nginx 中添加设置文件大小的配置行
# 比如如下路径
vim /etc/nginx/sites-available/nextcloud.evolute.in

# 在location 下面添加如下配置行
client_max_body_size 10240M;

# 当然也可以设置到其它地方但作用域不一样。
--- 设置到http{}内,控制全局nginx所有请求报文(附件)大小;
--- 设置到server{}内,控制该server的所有请求报文(附件)大小;
--- 设置到location{}内,只控制满足该路由规则的请求报文(附件)大小。
遇到的问题:
-
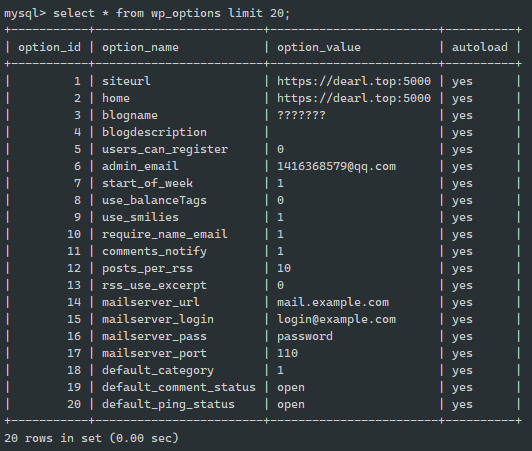
如果在网页后台站点地址被误操作更改。那就只能去服务器修改数据库的内容了。
docker exec -it w-mysql bash==★== 进入docker 容器USE wordpress;==★== 使用wordpress 数据库select * from wp_options limit 20;==★== 查找数据表UPDATE wp_options SET option_value="http://dearl.top:5000" WHERE option_name="siteurl";==★== 修改数据表内容
# temp

UPDATE wp_options SET option_value="http://dearl.top:5000" WHERE option_name="siteurl";
UPDATE wp_options SET option_value="http://dearl.top:5000" WHERE option_name="home";
- 更新docker 版本
- 先备份/var/lib/docker --> /var/lib/docker-bak
- https://cloud.tencent.com/developer/article/2195198 安装新版docker-ce
- https://www.jianshu.com/p/9261f29ea64a 处理掉使用docker 命令的报错异常
- https://zhuanlan.zhihu.com/p/422427865 恢复原来镜像